INSERT ALTERNATIVE TEXT FOR YOUR HEADER IMAGE HERE

Friday, September 9, 2011

Fascinating Fascinators.....

I was shocked to see how much a little head piece was when we went shopping last week.  OMG a really nice one we saw was 125.00 euro reduced to 79.00!  My mum needed one for the wedding we are going to and my aunt wanted my mum to get her one too.  So when we went to buy them they were going to cost  over 100.00 euro for 2 of them.

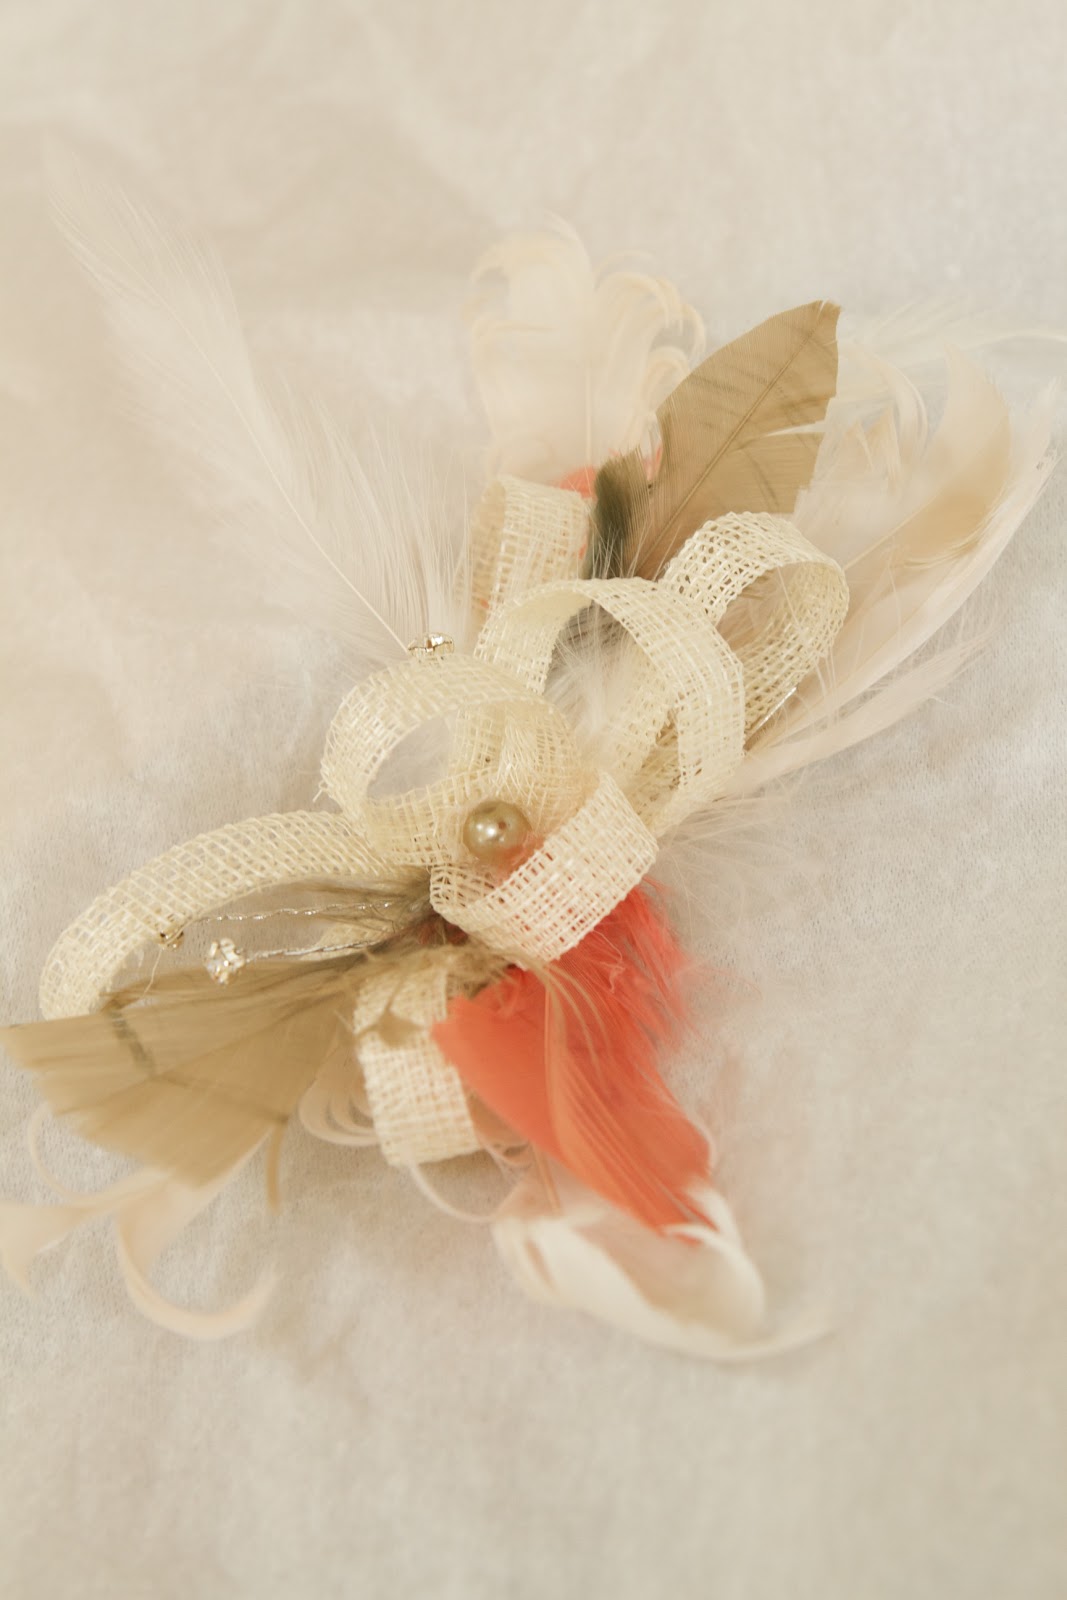
So I decided to have a go at making them..... I went to the suppliers and spent 30.00 on the stuff and with a glue gun and a bit of a mess here is what I made!!!

This first one is for my Aunt Winnie - listing it here so she can have a look at it and tell me if this is what she is looking for.  The colours are brown, black, and some copper and cream.


 This one is for my mum....  Taupe and a peach shade with cream.


I have so many crafty things at the moment that I have a list of stuff to do.  Off to my crafty day tomorrow so hope to make a huge dent in the list.

Ta M

Monday, September 5, 2011

Hate being late! (very photo heavy!!)

I am the most "On-Time" person in the world, Hate, Hate, Hate being late and it just killed me that I was so long getting this book to the blog today.  Shame on me that my life got in the way, but I did make great progress, then I had a few nights where I could not get to do any work on it and then with the  kids going back to school, a back to school party and Camera Club back on every week - this all contributed to less crafty time.
 Last week I recevied this fab kit from Handmade Hannah, and I loved it at first sight, kraft envelopes, Glassine envelopes, butterflies all my fav things!!!!  So inside the envelope was a piece of corrugated card to keep the envelope stiff during delivery, I chose to use this as the cover for the book and I stencilled the front using one of the decorative masks / die cuts from the kit!  I used one of my fav stamps "FAMILY" and it all started from there!

When I started I knew I wanted a book to keep all the photos from this summer - so that was my starting point.  I made a fan from some of the kraft card and used this as the binding for the book.


 Above is Page 1 & 2, I added some rubons to the Glassine envelope and because of the texture of the envelope they adhere so easily.  I also added a rubon to the acetate tag, again it went on like a dream. and I added some white paint to the edges. The Seam Binding was white so I coloured it with my pro-markers to match the colours of in the book.


 Love toothpick flags!!!
Glassine envelope with journalling tag inside for notes.
 Page 3 & 4 - simple designs but I added one of my sayings that I use on a daily basis! Remember to be Kind!
 Page 5 & 6 The butterfly was another die cut and I inked him up and added some backing paper to him and some pearl antenna's.  As the paper is so embellised already  I chose to keep Page 6 blank but I did use on of my Papertrey Ink dies on the edge.
 Page 7 & 8 - Bunting one of my fav things to add to a book, and I used the tags to form the next page with Glassine envelopes with rubons for holding notes and more photos if required.  Text reads Love (on the pin!) Lives Here.

Page 9 & 10 - Back of the Glassine envelope is another small envelope with more rubons and stickers. Page 10 is a very pretty page so left this blank and die cut the edges.

 Page 11 & 12 This page is very simple, just a die cut and butterfly and Page 12 has an Acetate Tag embellished with a white rubon (SISTERS) and I cut the Adore from a sheet of the paper and added some circles and lace.
Page 13 & 14 Oh the Hessian tape - the first thing I did was stamp on it!, I just love the way it turned out and then I coloured part of the Die cut and added some backing paper and gems to make the flower cluster.  Page 14 is lovely on it's own, so left it for photos.
 Page 15 & 16 - Just a  small cluster of embellishments, and a pin and a piece cut from the acetate frames.  Page 16 is the last page and a lovely envelope for holding the tickets from the zoo and other bits that I want to keep in the book.

The book is blank as we are heading to Boston in about 2 weeks time for a special family wedding and a bit of a holiday. So when I come home I can finish this book by adding the photos, tickets, memorabilia and journalling from our holiday.  This summer has been very quiet as we did not get away and Lea had been so sick for nearly 2 weeks, and Shannon was in camp for most of July.

Hope you like my interpretation of the kit - loved looking at all the books and seeing how everyone made it their own.  Head on over to Hannah's web shop and have a look around and see what lovely stuff she has!  Handpicked stash with her lovely taste!
Sunday, August 28, 2011

More mini-stuff....

When we head to our holiday home, I try and take my craft bag with me (actually it's 2 bags but whose counting eh!!)  I really should make myself up a bag that stays there permanently, but I know that if I did, the item I wanted will be a 2 hour drive away and that would drive me mad...

The car was packed and full to the top, not a spare spot so if I wanted to take the craft bag I would have to carry it on my knee and I did...  So along with my camera gear, I took the 2 bags in the front seat by my feet and on my knee - not comfortable but so worth it.

On the evenings that I did sit down to craft, I challenged myself to do something different, on one of the nights I made the little wallets below and on another I made these little cards.  I had some of those square 135mm x 135mm cards and I just cut them in half.  The 3 parts made the cards and the last one I used to stamp the butterflies on as I had very little plain cardstock with me, it was all textured.

The papers are Pink Paislee and the butterfly stamps are Martha Stewart.  Very simple cards, quick an easy to make, but handy to have in your stash for that day when you need a card.

Now don't look too closely, as there was a little accident!  On the Sunday we were heading off it was raining on and off all morning, the car was being packed by DH and I was cleaning the house, so I left the bags that needed to go to the car in the hall and then just noticed the rain.  So DH ran out and closed the boot of the car but when I got home I noticed that the rain had gotten on some of the titles to the cards so they are a little blurry...  Shame as they will probably not get used now.

On the day we were going home the rain did shine briefly that morning and that day I did a little photo-shoot with next doors children.  The rain had just stopped and the sun came out but the ground was soaking so what looked lovely was in fact a soggy mess underfoot.  Here is how I presented the images to her...

She got a disc of Images and another of a DVD I made for her with all the edited images for the day.  Here are some of the nice images we got that wet morning.


I am off to clean up after having friends over for dinner last night, hate waking up to dishes, but seems my DH decided not to help after I went to bed.  Tempted to leave them to him but know that won't happen!!!  Have a great day! M

Thursday, August 25, 2011

More Micro than Mini!

When my Grab Box arrived there were a few lovely little items, a little kraft envelope, a glassine envelope (love love love!) and a large-ish tag.  I immediately put these aside as I had a plan for them that popped into my head instantly!!!!

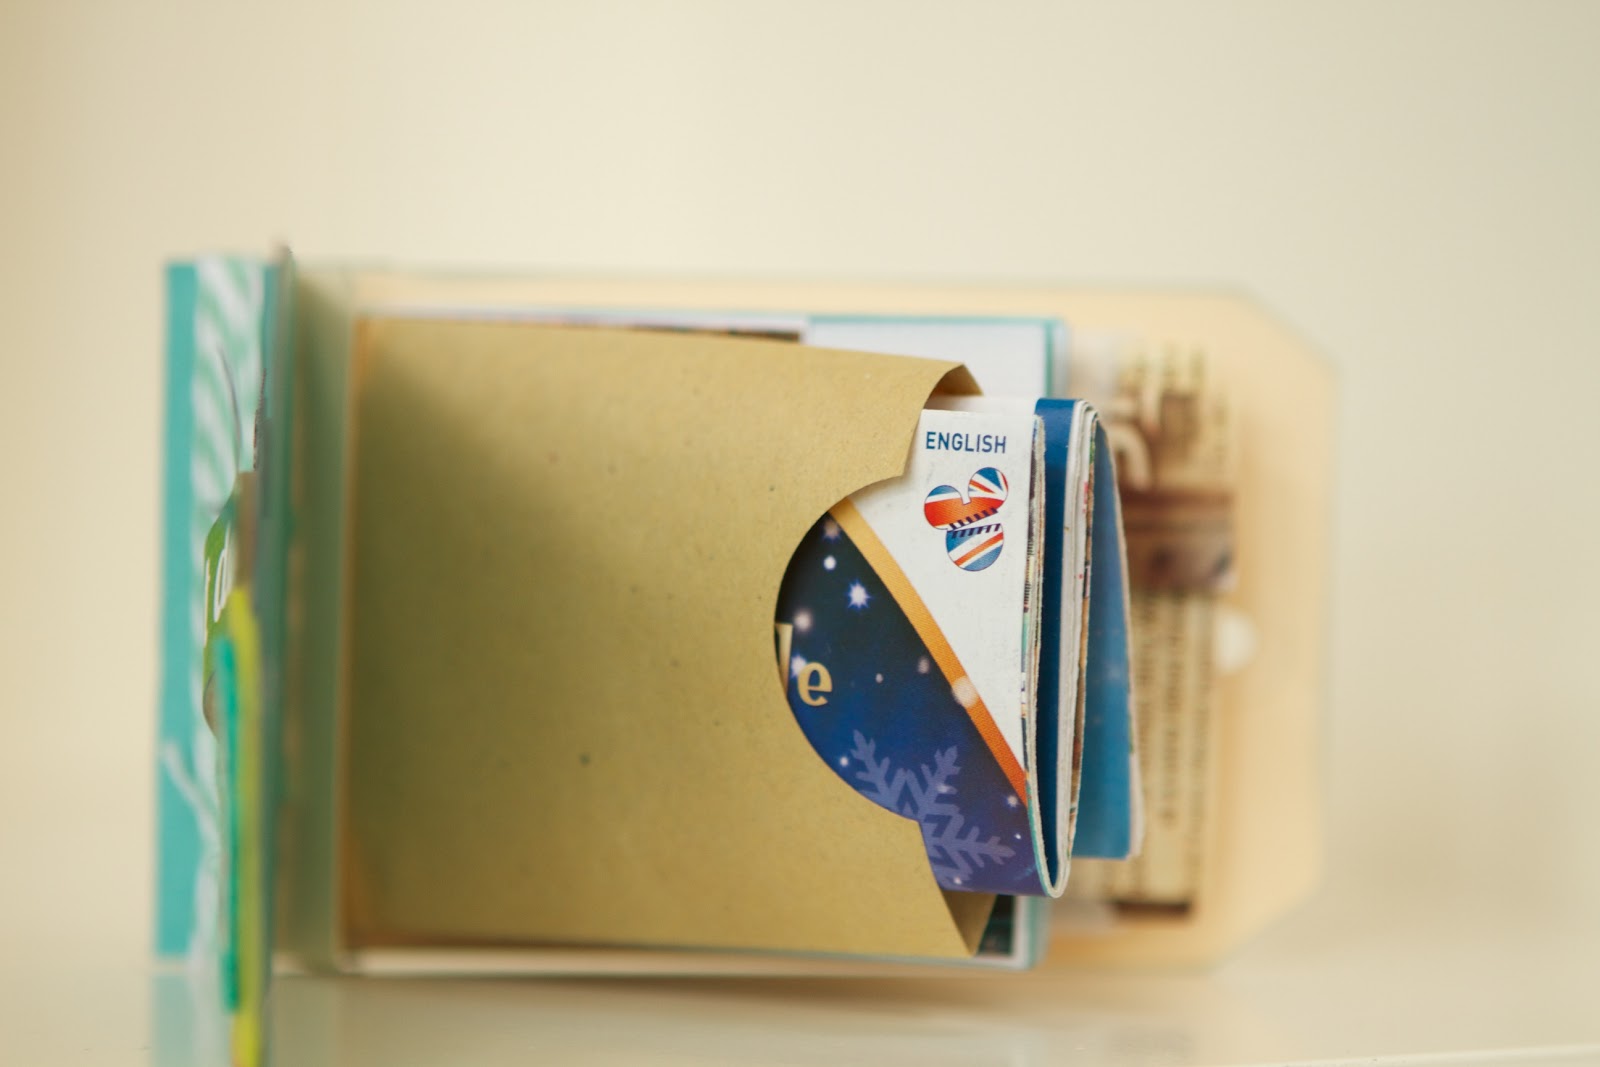
This little book fell into place, I folded the tag over a little to make it just a little bigger than the paper sheets that I cut the same size as the kraft envelope.  I spaced the paper bits in the centre and folded the tag over and punched 4 lots of holes thru the bunch of papers using my crop-a-dile.  Then using some fab string I used it to weave in and out of the holes and tied it securely in place (still with me?)....LOL!  Front decorated with sticker, flower, and bakers twine from box.  A Perfect Day title from a crate paper sheet that was also in the box.

Micro-book - Disney Paris (not Aris! as it looks like it says!)

Using a piece of left over cardstock (see the wedding LO!) that was lying on the desk, I used this as the front cover and the body of the micro-book was ready!  Now I have been keeping a lot of memorabilia that I wanted to use for minibooks, tickets, brochures and other bits from Disney Paris and Universal in Florida and knew there was stuff there, but when I went looking the tickets from the Disney trip have gone missing, and I had wanted to add them to the kraft envelope, so a map of the park from the trip had to do, till I find the tickets that are obviously in a very safe and obvious place....;)

The back of the micro-book....

Little Kraft envelope, supposed to hold the tickets but holds the map of the park....

Photos of the trip printed in passport size perfect for the book.

Inside pages - not all as you will be bored silly!

Lovely little glassine envelope - with ticket from Dinner Show

So that is it, 3 items and not made a huge dent in the box.  I had some other stuff to do and will be back playing with the grab box tonight for sure!  Thanks for popping in!

Ta M

Wednesday, August 24, 2011

Small paper storage!

Loving the Grab Box that arrived from Hannah's Handmade Craft Shop, I used some of the papers inside to make these wallets to hold, die cuts, photos and those Crate Paper cards that I love so much.

I love the Crate Paper sheets with the small little cards that  you can use on LO's or cards.  When I cut into the 12x12 sheet, I tend to cut all the little cards out and I had them stored in a small bag and this was getting damaged from being in my craft bag.  So I made this little wallet, and then I liked how fast they were to make and what such a handy little thing to have in my craft bag to keep photos, small die cuts and chipboard items safe in my bag.


Expanding Wallet


Supplies.....
Piece of cardstock 18cm wide by 30.5 (12”) long.
Same size patterned paper (or smaller if you wish!)
Co-ordinating cardstock
Embellishments
Sticky Velcro
Extra Tacky Double Sided Tape
Score board & Score tool

Cut a sheet of carstock 18cm wide by 30.5cm long and score at 10cm and 23cm.  On the short side (7.5cm) you can use a border punch on this edge as it’s the front pocket of the wallet.  I covered this in a patterned paper and inked the edges on one of the folders.
Take the Co-ordinating cardstock, cut a strip off the 12” piece that is 9.5cm wide and score this on the box side of the board at regular intervals around 1.5cm each and about 10 times.  Fold this piece into Mountains & Valleys and cut into two sections giving you two fan folds that are equal in size for each side.
I used the extra tacky DST to attach this to the sides of the wallet, and then embellished away, making the wallet as bling as you wish!!!
So off you go and make some of these - they are useful and fun!
Ta M


Tuesday, August 23, 2011

Grab box heaven....

The thing I like about kits and grab boxes is that you have no idea what's in them.  When I have been in a monthly kit club, I never looked at the site to see what was coming, I always wanted the joy of opening the kit, and stroking the papers, and un-peeling the layers of stash.  I might sound weird, but happy to sound that way as I so very much enjoy the surprise element of each kit.

My hands were itchy to get going over the weekend, but I needed to spend some time on this house, and shopping to get the kids dressed for a wedding we are all going to in September (Hi Jen & Tim!).  So when I finally got to pick up the box from the post office I just dropped all motherly and housewifely chores and played happily with the stash!  I have already been working on a project and tutorial which I will post this week, so I wanted to share this LO that I made.

Apart from Scrapbooking and Paper crafting, I am really into my photography, and was the main photographer at a Wedding recently, and helped out with another friends wedding a few weeks ago.  I have been making a Photo Book for the Bride & Groom and my head was just full of the photos.  When I opened the box I realised that inside was the Crate Paper Wedding die-cuts and stickers and that just sealed the deal for me as Hannah must have crawled inside my head and seen what I was working on as this was just perfect.  So all first plans for the box went out of the window and I started with a photo and a copy of her sketch and this is what I made.


The sheet of cardstock, the gem pin and ribbon were the only bits I had to add to this LO, the rest came in the box!  It was stuffed and I am cutting and sticking like mad.  The next few days will be be a flurry of posts to share what I have made and what potential there is from these boxes....  Not hard when Hannah picks such fab products.

I hope you like the LO and it might get you to scrap one of those wedding photos!

Ta M

Tuesday, August 16, 2011

Small card with big feelings....

Last week our family Social Worker retired, it was a lovely 8 yr relationship, where we were always on the same page, never had a cross word and she always had my back.  (Just in case you are new here, my husband and I foster 2 little girls and have been foster parents for nearly 7 years now).  Anyway, it was a very sad day when we had to say goodbye, and I suppose after all those years, it really is not goodbye as we will still remain friends.


Here is the card that I made for her - along with a gift card for Marks & Spencer.  I used Crate Paper and The Girls Paperie papers....  some handmade roses and a Websters resin rose.  Most of the items came from my Handmade Hannah's Grab Box that I recently got my hands on and if your quick she will have some available tomorrow.  The price is £10.00 and it's fab value.

Thanks for looking.....

Michelle